
This guide shows you how to make a two-way synchronization of a ring in your Plandisc and your Outlook calendar.
1. Go to Plandisc Setup.
Prerequisites: Ensure you have an active Microsoft Outlook account (Microsoft 365 or Outlook.com) and that you are logged in to Plandisc as an admin or a user with calendar permissions.
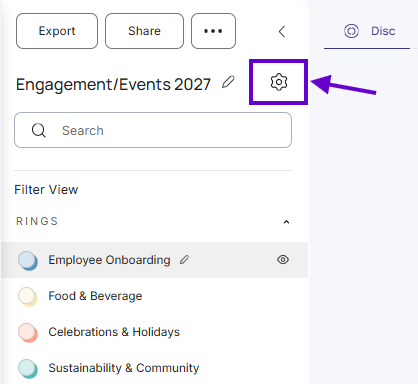
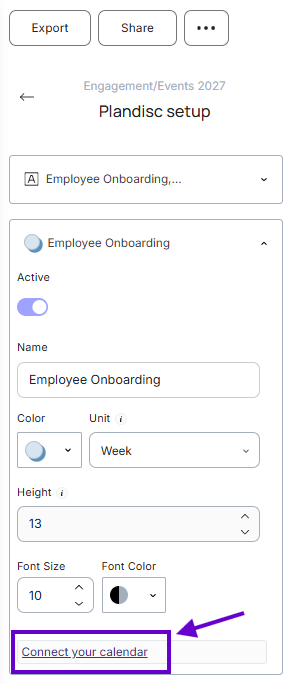
2. Choose the ring you wish to synchronize with your Outlook calendar and click “Connect your calendar”.
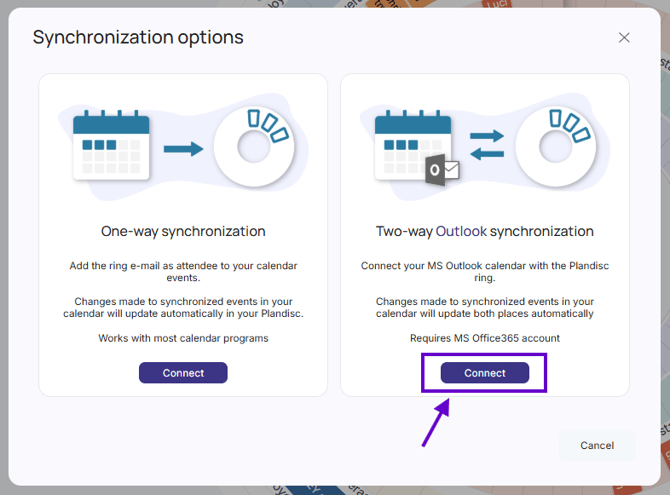
3. Choose “Two-way Outlook synchronization”.
4. Add or select your Outlook account, then enter a name for the new Plandisc calendar that will appear in Outlook, and click "Create".
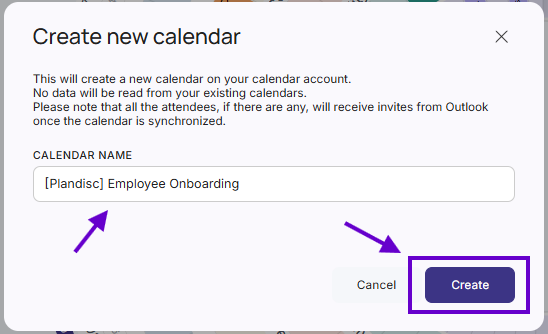
The synchronization will start and a message will appear on your screen when it is done.
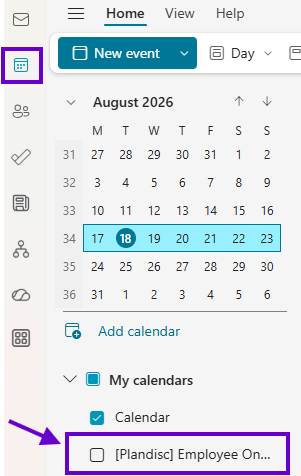
5. Open your Outlook calendar and find the Plandisc ring under "My Calendars". Select the checkbox next to it to display activities from the ring in Outlook.
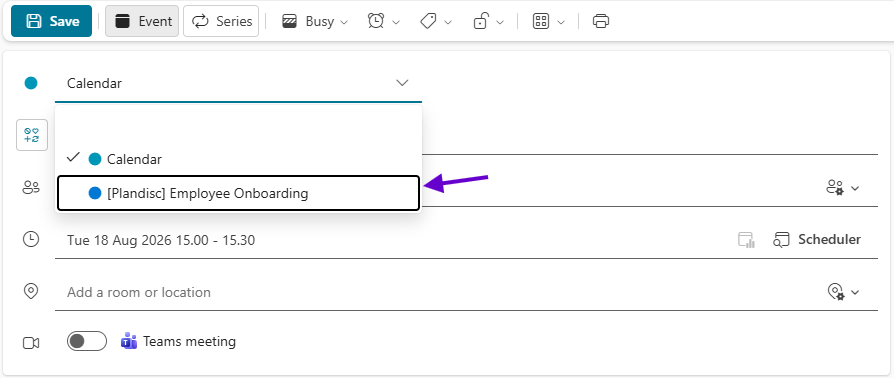
6. You can now create activities and add them to the Plandisc ring by selecting it as the calendar when creating the activity.
Synchronization
Now your Outlook Calendar and Plandisc calendar rings will synchronize with each other.
This means you can create, edit, and delete activities in either Plandisc or Outlook, and the changes will automatically appear in the other application. Please note that synchronization can sometimes take a while to be completed.