
Integrating Plandisc with Microsoft Planner lets you and your team synchronize tasks across activities — giving you a shared, real-time view of task progress directly within your circular planner. To get started, log into Plandisc with your Microsoft account, approve the sync, and link a Planner board from any activity.
This is ideal for teams who want an overview of micro-level tasks across activities, need to see which tasks belong to which activities, or want to assign tasks to colleagues.
To integrate and synchronize Plandisc with Microsoft Planner, follow the steps below.
What are the prerequisites for integrating Plandisc with Microsoft Planner?
Before you get started with the synchronization, check the following requirements:
- You must be logged into Plandisc with your Microsoft login. If you logged in with a different method then log out by clicking your name in the bottom left and clicking “log out”. Now select Microsoft Login as your login method.
- You need to approve the synchronization. When prompted, a dialog box will appear asking you to grant Plandisc permission to access your Microsoft Planner account. Click Accept to approve and continue.
Synchronizing:
- Find the activity in your Plandisc that you want to synchronize with Planner.
- Click "Add task" and "MS Planner board".
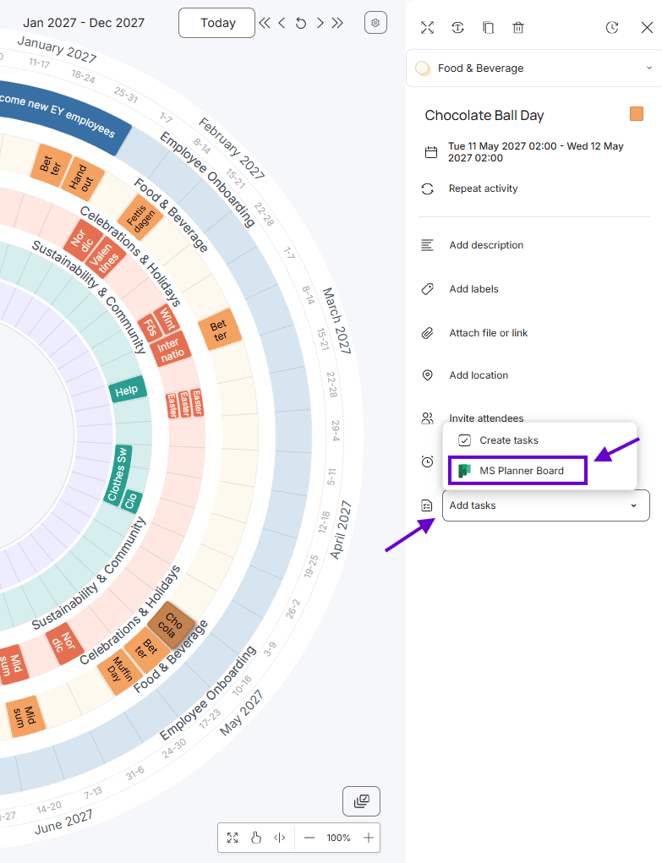
- Choose the plan you want to display on your activity. The plan will always be updated from Microsoft Planner, so you see the latest version of the plan.
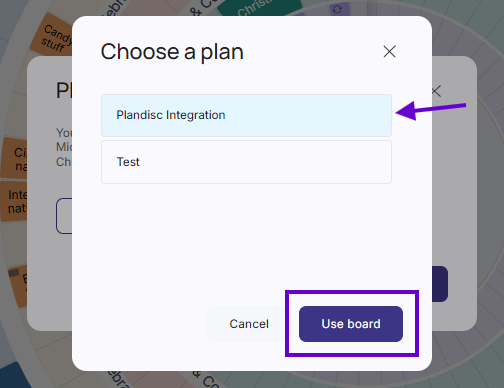
-
From the drop-down menu, select the bucket you want to view on the activity. You can choose existing buckets or create a new one. You also have the option to view all tasks from the plan.
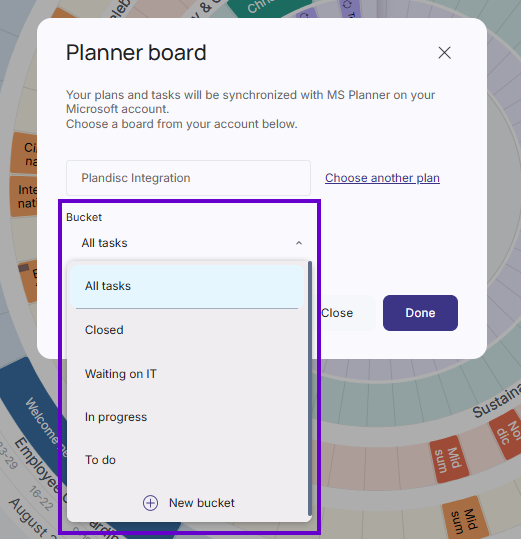
-
To add tasks to the plan from Plandisc, click Add Task.
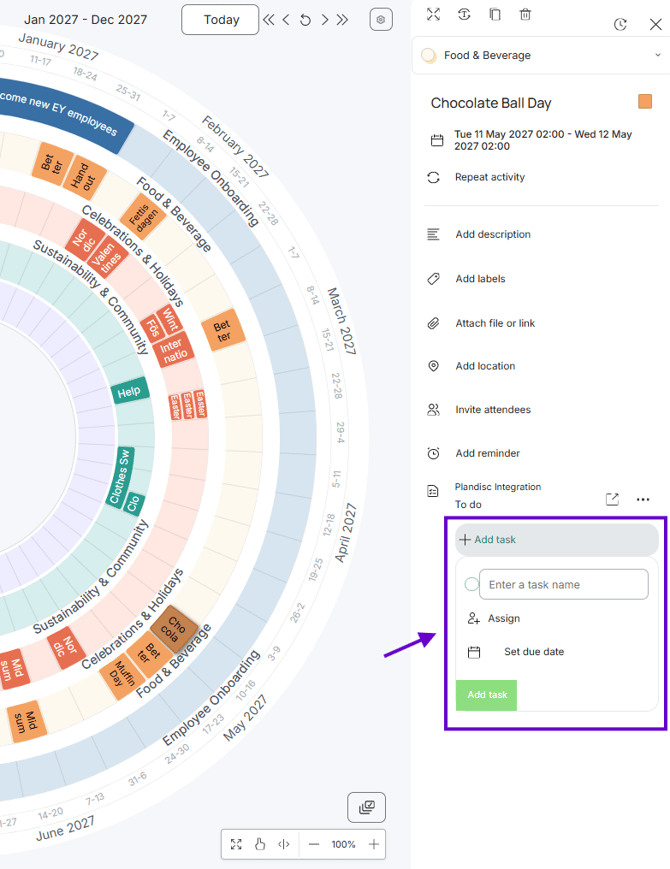
-
You can also open the plan directly in Microsoft Planner, change the associated bucket, or remove the plan from the activity. To access these options, click the more options icon (⋯) on the linked plan.