
Plan together in the same plandisc. You can invite colleagues who have a Plandisc license, and you decide what each person can do: read the plandisc, or read and edit it.
Invite one or a few people
- Open the plandisc. Click Share, then Invite collaborators.
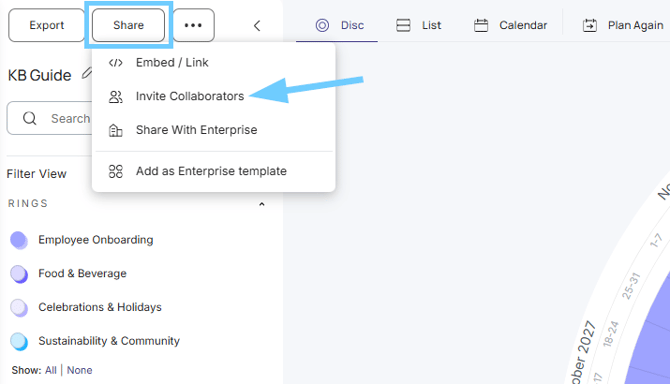
- Enter the email address of the person you want to invite.
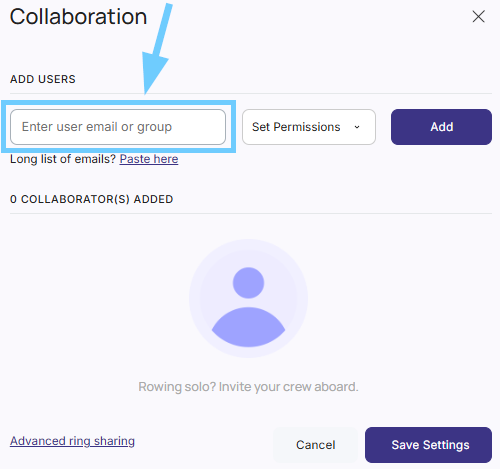
- Choose their permissions:
- Read: they can view the plandisc.
- Read and edit: they can view and make changes.
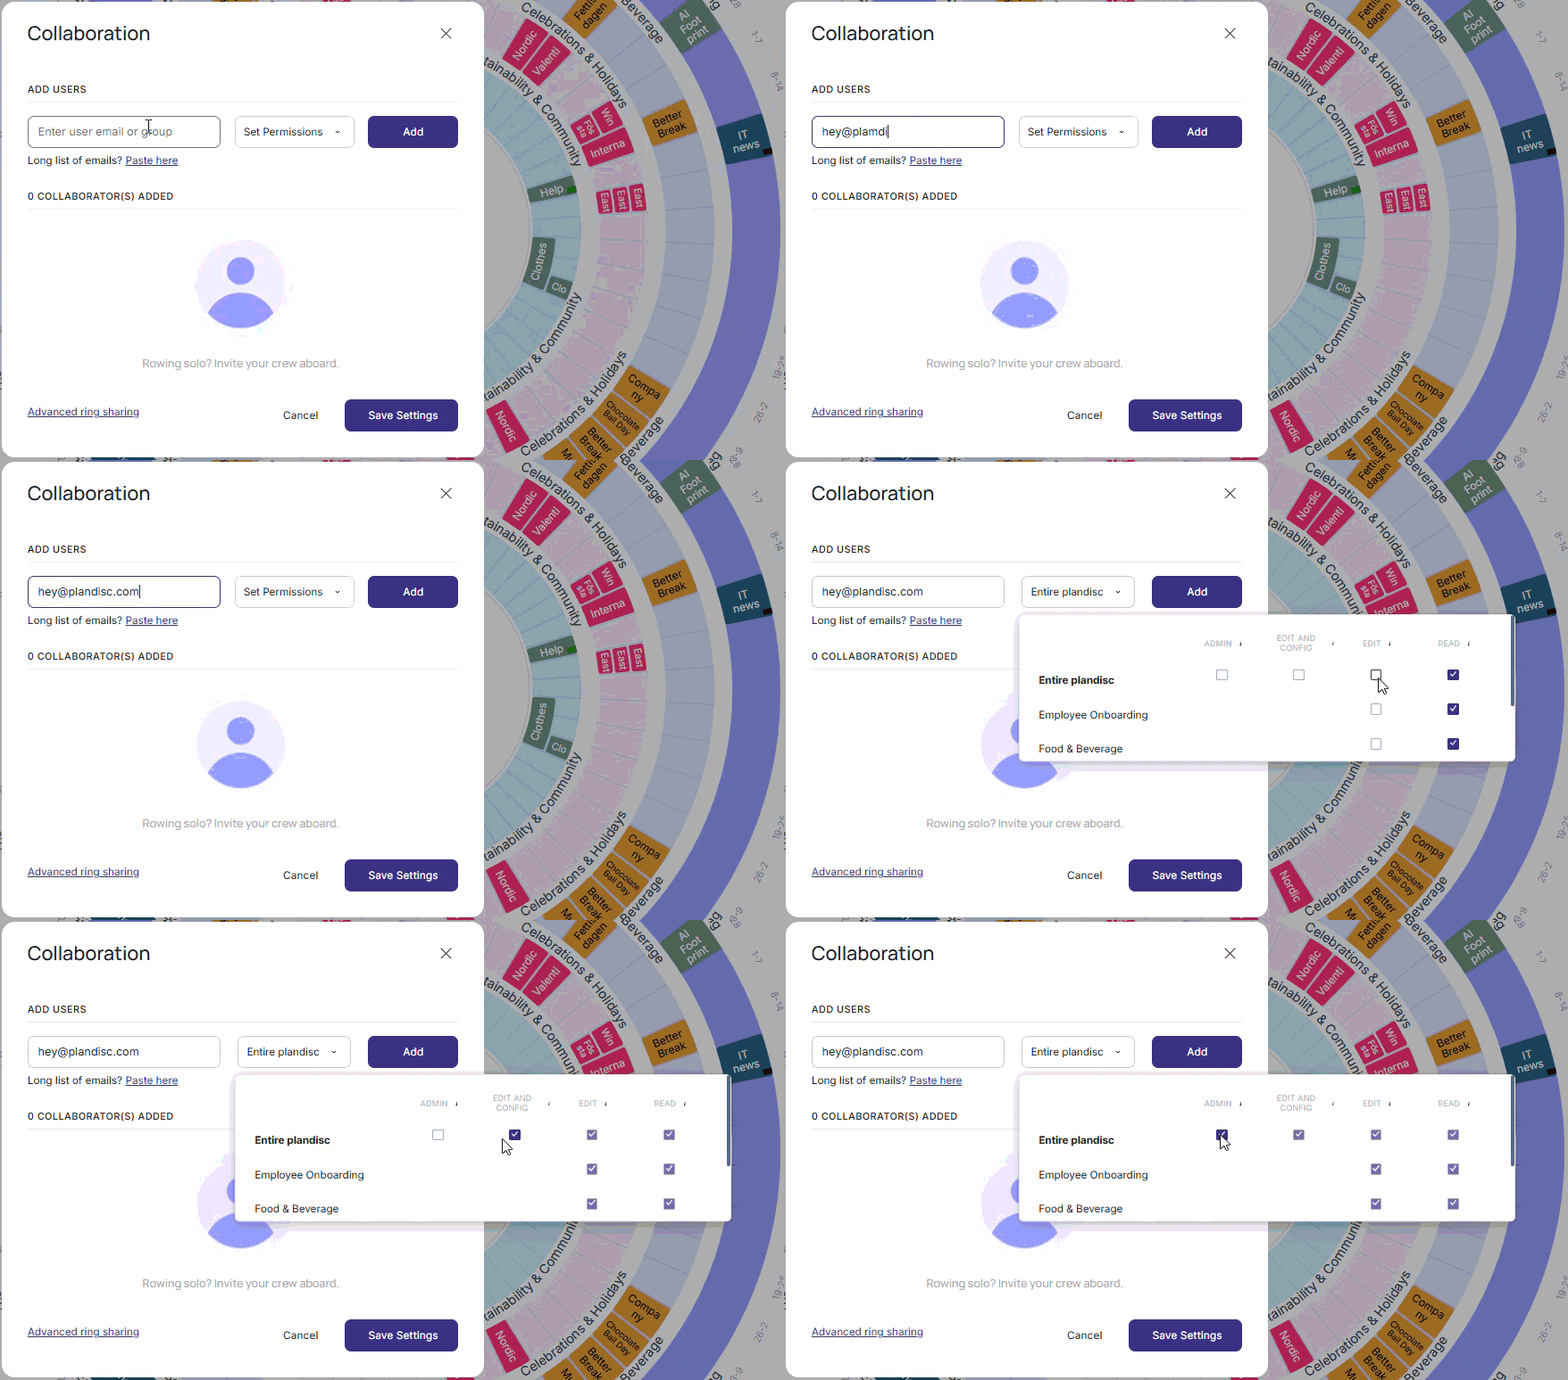
- Click Add, and then Save Settings.
That's it. The plandisc now shows up in their sidebar.
Invite a long list of people
Have a lot of people to add? You don't need to enter the emails one by one.
- In the Invite collaborators window, click Long list of emails.
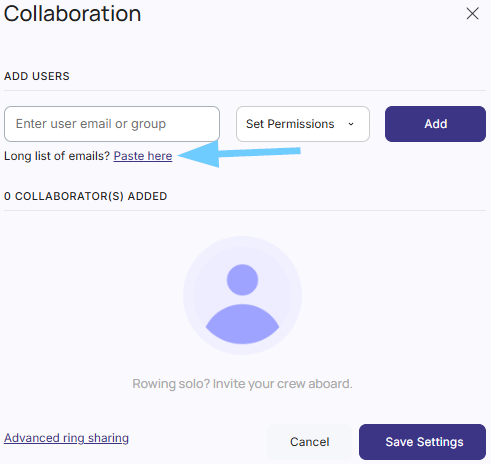
- Paste the email addresses. Separate them with a comma, semicolon, or new line.
- Choose their permissions.
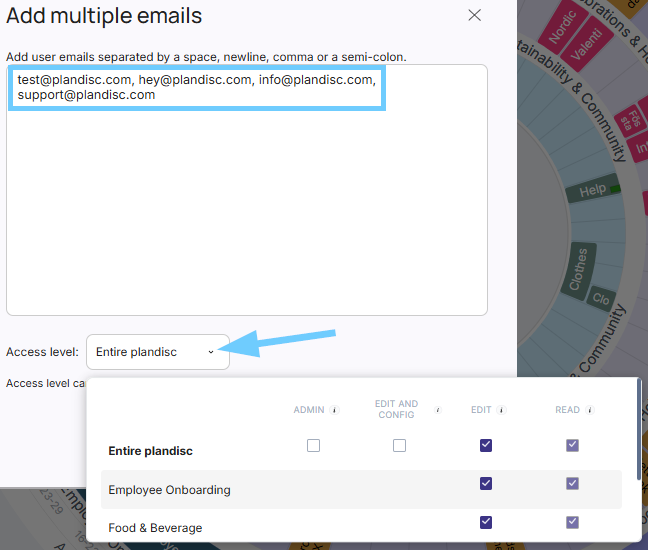
- Click Add Users, and then Save Settings.
Share specific rings with a code
Use a sharing code when you want to give access to certain rings only, or share with a large group.
- Click Share.
- Click Invite collaborators.
- Click Advanced ring sharing.
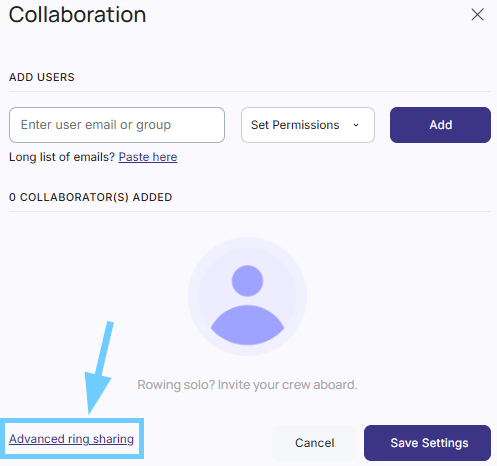
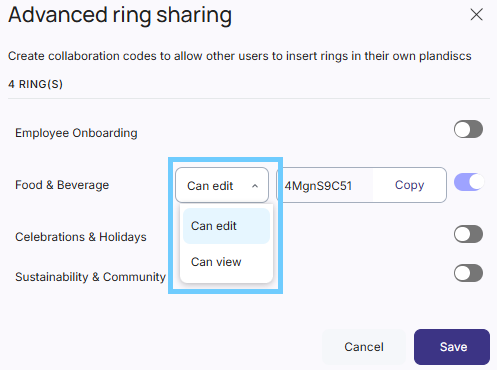
- Turn ON the rings you want to share. Leave the others OFF.
- Choose Can view or Can edit.
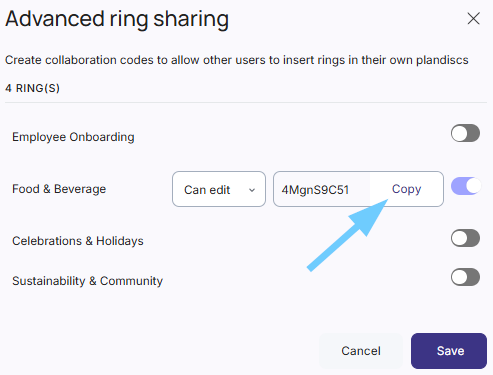
- Click Copy to copy the code.
- Click Save.
Your code is ready. Send it to the people you want to share with.
Use a code you’ve received
Did someone send you a sharing code? You can add their ring to your own plandisc.
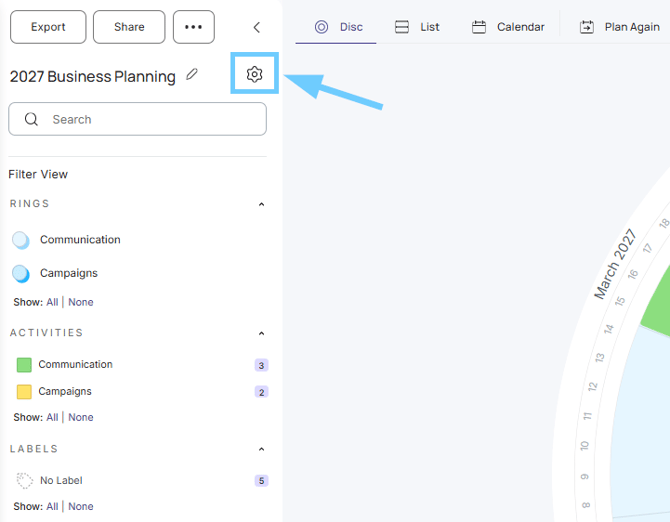
- Open the plandisc you want to add the ring to. Click the gear icon next to its name to open the settings.
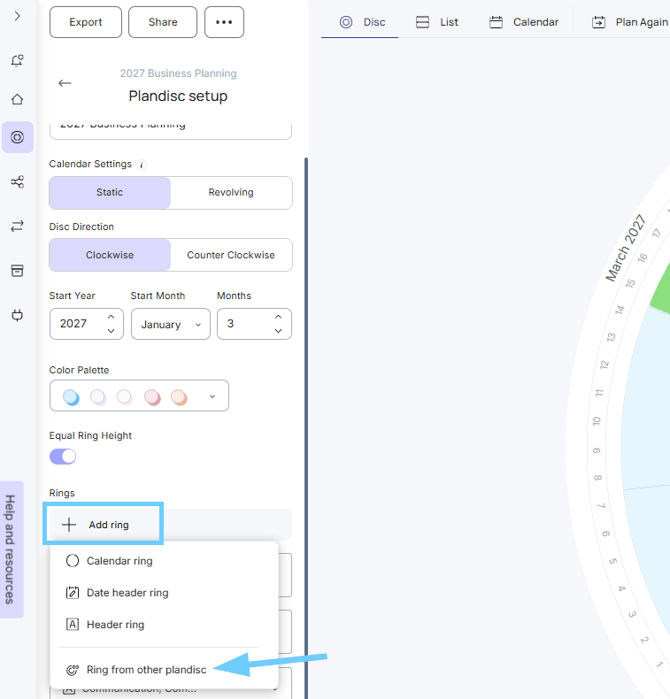
- Under Rings, click Add ring.
- Select Ring from other plandisc.
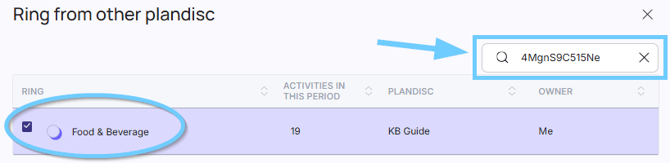
- Paste the code into the search field. The shared ring shows up in the list.
- Tick the box next to the ring.
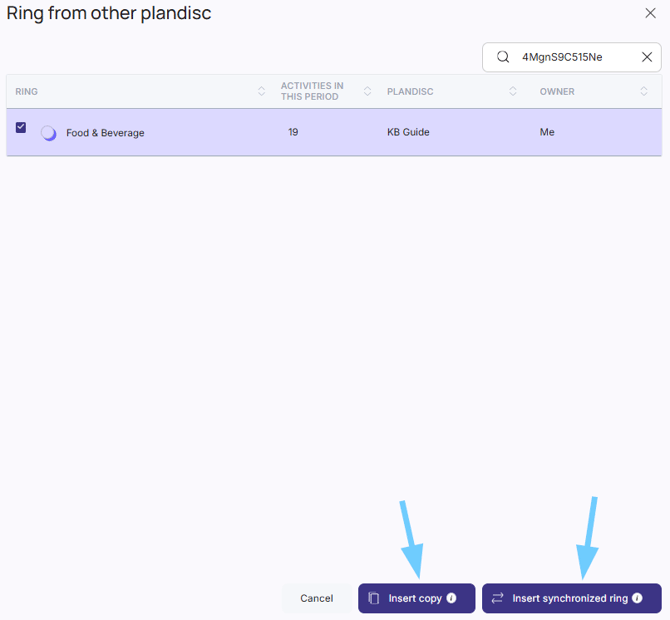
- Choose how you want to add the ring:
- Insert copy: adds a copy of the ring as it looks right now. Changes in the original ring won’t show up in your copy.
- Insert synchronized ring: adds the ring with a live link to the original. When the original changes, your ring updates too.
The ring is now part of your plandisc.
Please note: Only the ring itself is added, not its header. To show a name above the new ring, like the other rings have, add a header ring. Click Add ring and select Header ring.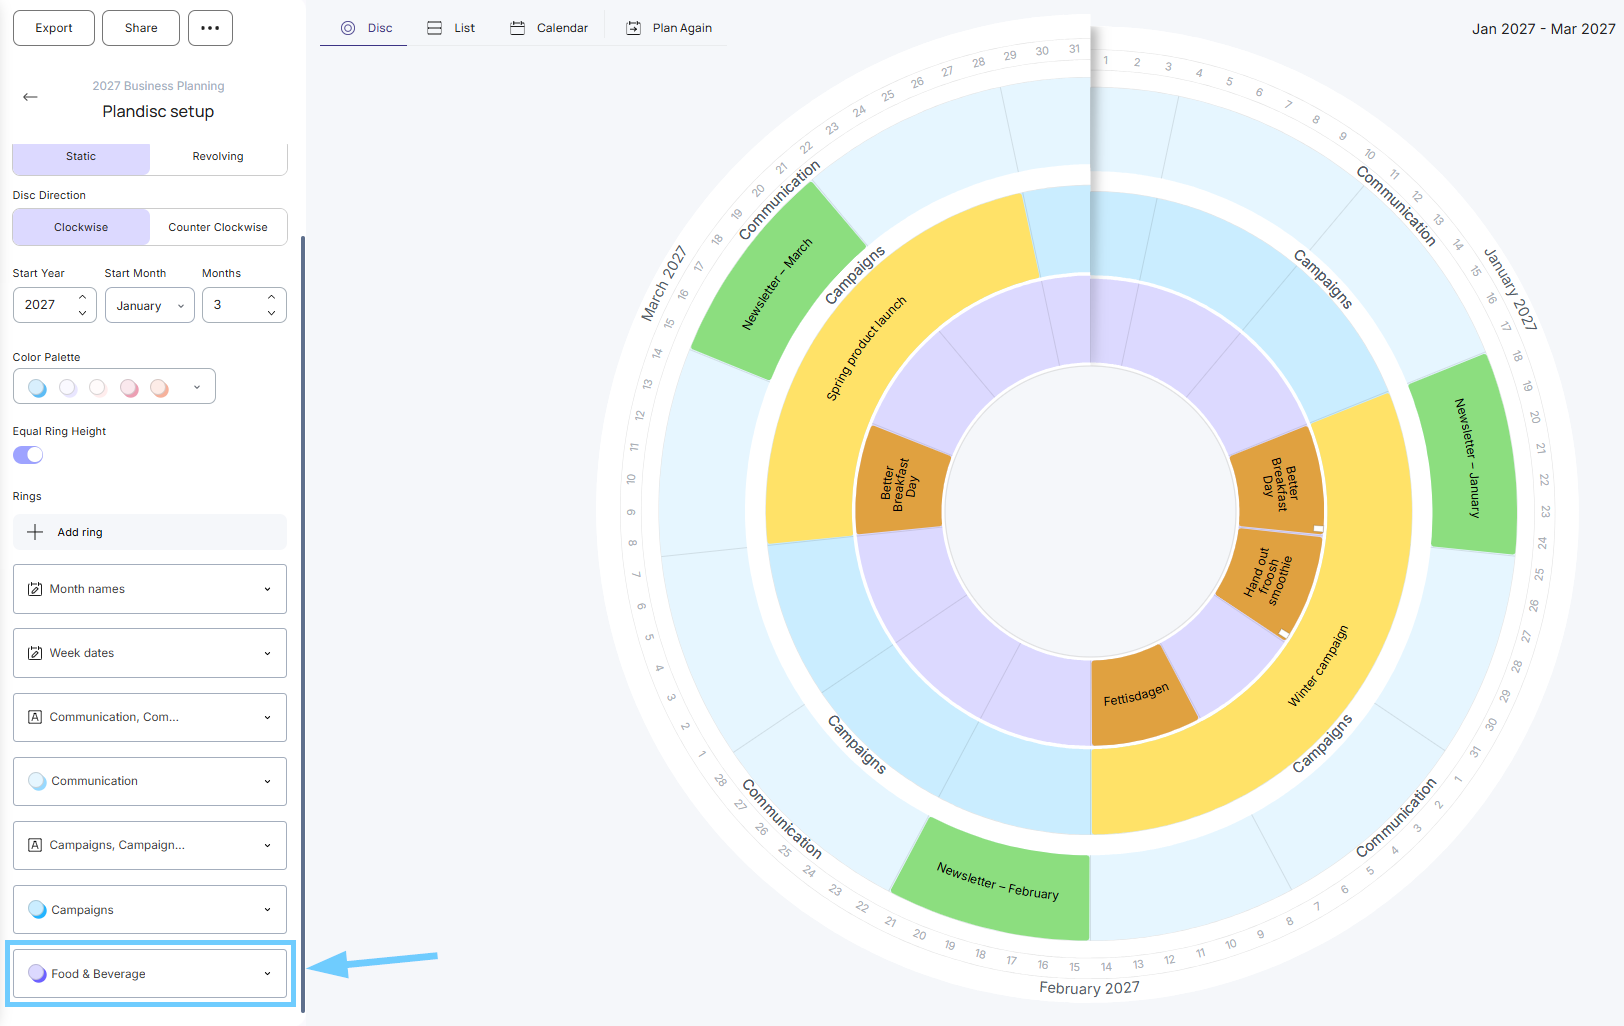
Warning: If the code was made with Can edit, you can also edit a synchronized ring. Your changes show up in the original ring too.